How to Refill Ink Cartridges – A Guide on How to Replace an Ink Cartridge
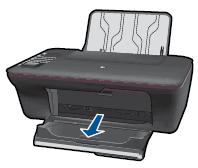
Step One – Load Paper
When a new ink cartridge is installed into a printer, most printers will ask you to insert paper in order to complete the cartridge alignment. Please make sure that paper is loaded in the printer before you begin the alignment procedure.
These are the steps required to load the paper:
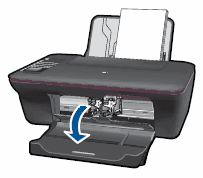
- Raise the printer’s input tray.
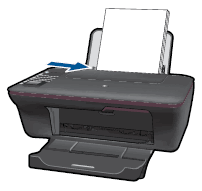
- Lower the printer’s output tray and pull out the extender if you’d like.
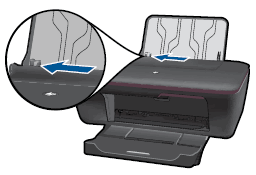
- Use the guide to slide the paper into the input tray.
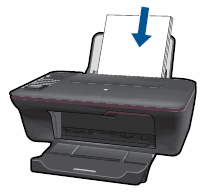
- Take your paper and place it inside the input tray. Make sure that the paper is placed print side up and that it is placed in until it stops.
- If your printer has a width guide, please slide the width guide firmly against the paper loaded in the input tray.

Step Two – Replace the Ink Cartridge
Once you are done loading the paper into your printer, please proceed to these steps and replace the ink cartridge:
- Power on your printer. This is usually achived by pushing the Power Button located on the front or on the side of your printer.
- Open the compartment in your printer that holds the ink cartridge(s). This is located on the front of most printers and it will likely require you to push or pull a carriage out of the inside of your printer. Once your are done locating the carriage please wait until the printer is idle and silent before continuing to the next step.
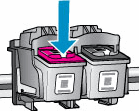
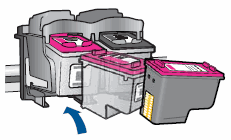
- Inside the printer cartridge door you should be able to locate the printer cartridges. Most printers will have several ink cartridges of varying colors. Once you locate the color you are replacing, push down on that cartridge to release it from the carriage. Once the cartridge is released, pull it out of the printer.
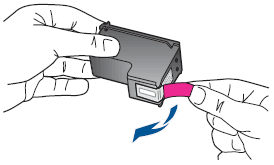
- Hopefully you have already purchased a brand new ink cartridge and you are ready to load it into the printer. If not, please follow this link in order to purchase an ink cartridge. Remove your new ink cartridge from its packaging and the proceed to remove any tape that is currently on the cartridge. Please do not try to re-tape the cartridge or touch any of its sensitive parts.
- While holding the cartridge by its sides with one hand, insert it into the printer carriage ensuring that the metal contacts are facing downward. Make sure that you are inserting the cartridge into its appropriate color slot.
- Once you line up the ink cartridge with the slot, gently insert it and push down.
- If you have any other cartridges that need replacing, simply repeat these steps one by one until you are finished.
- After you are done replacing all of the colors that need replacement, close the printer’s cartridge door and make sure that it snaps into position.
- Follow any needed instructions on the printer’s control panel. The first instruction will likely be to push OK. Once this is finished your printer product will print an alignment results page.
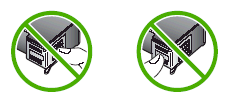
Be sure not to touch any other parts inside the printing carriage.

Step Three (optional) – Align the Cartridges
If your printer comes with a scanner you can use that scanner to assist you in perfectly aligning the ink cartridges. Please follow these steps:
- Lift up the lid of your scanner.
- Once your scanner is lifted align your alignment page with the top right corner of the glass in your scanner.
- One the paper is perfectly aligned, close the scanner lid.
- Follow the instructions on your printer’s control display. This usually involved pressing OK to start the next step.
- If the alignment is successful, your printer will display a success message on its control display panel.

Congratulations! If you followed these steps then you should now have a fully functional printer that is able to print in all of the colors of the ink cartridges that were replaced.
We hope you enjoyed this guide brought to you by Ink Cartridge Refill.